

So, you finally ordered that sleek and modern aluminium bifold door that will take your home’s design to the next level! Now what?
The next step is installing your new doors into your home! We always recommend getting a trusted installer to install your doors to ensure optimum performance, smooth operation and longevity. However, if you’re looking to install the doors yourself as an experienced diy-er, you’ll want to know the next steps. Fitting our aluminium bifold doors doesn’t have to be overly challenging, especially if you have some experience in home improvement projects. However, there are a few things you need to know – and that’s what we’re here for.
One of the steps that should never be overlooked is the toe and heeling of the bifold. It is imperative that a bi-folding door is properly toe and heeled the first time! We’re here to explain exactly why…
Toe and heeling a bifold door is essential to ensuring that it operates properly and lasts for years to come. Toe and heeling refers to the process in which the glazing panels are used to distribute weight into the correct areas of the door. This way, the glass panels within the bifold is able to support its own weight without causing the door panels to drop or catch on the bottom track when in use.
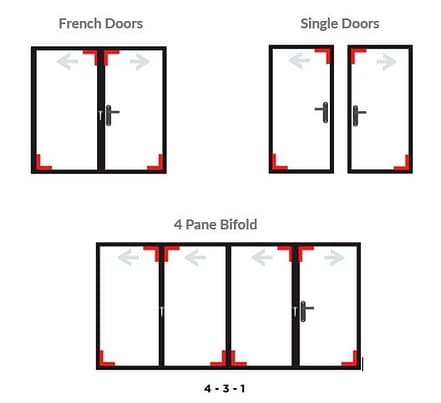
The principles of toe and heeling a bifold door are the same as that of a single or French door and involves using packers to brace the glazing in the necessary corners of the panel. This always starts with the bottom corner that is fixed to the wall, and then the opposite top corner. Below you will find an easy step-by-step guide on the correct toe and heeling process.
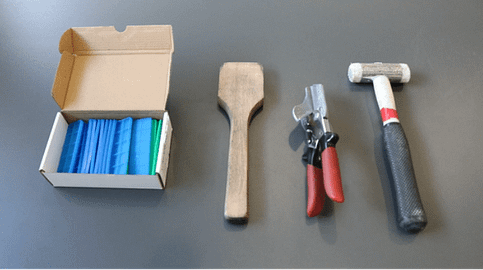
What you’ll need: Packers, a glazing paddle. gasket snips, and a glazing mallet.
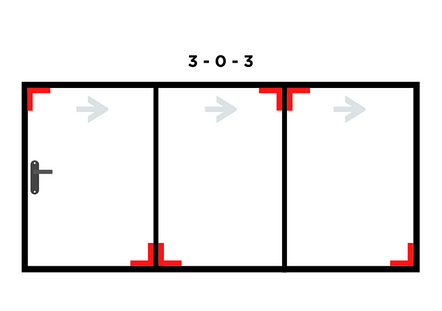
Begin by toe and heeling the first panel in your bifold door at the wall end, and work along the bifold to the traffic door in a zigzag formation (see the diagram below). Start with the bottom corner first and then the top corner that is diagonally opposite. The below diagram shows an example of how you would work on a 3-pane bifold door.
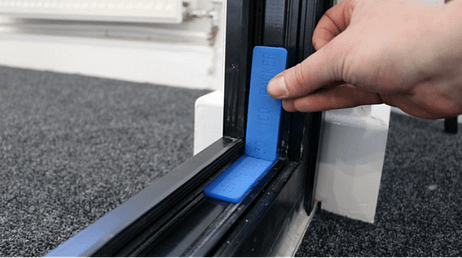
Begin by placing one 5mm packer horizontally and another one vertically in the correct bottom corner of the first panel like below. Correct packing ensures smooth operation of bifold doors, preventing friction.
Repeat step 2, this time in the top diagonally opposite corner to where your first plastic packers were placed before installing the glazing unit.
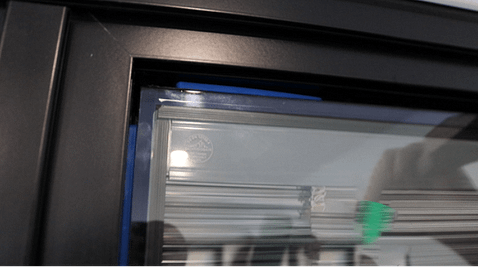
Use your glazing paddle to create a gap between the glass and the top of the frame. Apply pressure on your glazing paddle to lift the frame back into its level position. Place additional plastic packers into the gap until the space is full and the glass sits tightly within the frame. Repeat this at the side where your vertical packer was placed.
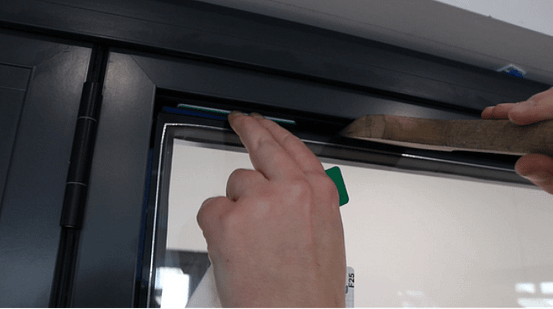
Repeat the previous step in the bottom corner where you placed the first packers, again making sure that the glass sits tightly within the door frame. This technique maintains the door’s structural integrity and make sure the door can operate smoothly.
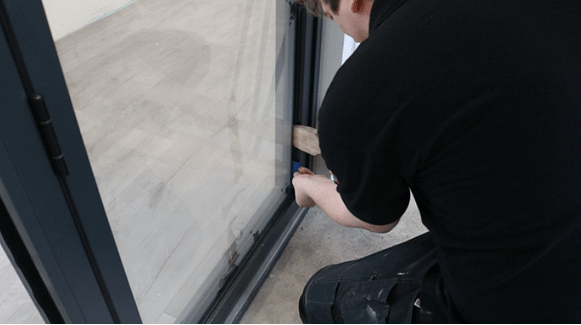
Repeat all the previous steps with the rest of the panes in the bifold, making sure to follow the same pattern all the way along the door.
Now that you have toe and heeled each panel, you can complete the installation of the bifold. Start by fitting the beading and then wedging the gasket between the glass and bead on all four sides. Once complete, you’ll have a fully installed door so you can stand back and take in a job well done!
Note: Toe and heeling follows the same principles whether you’re glazing a single door, French doors, or a bifold door.
The examples below illustrate where packers should be placed for each type of door.
Our sleek and modern aluminium bifold doors are handcrafted by our team of industry experts, unique to our customer’s specifications. We offer market-leading sash sizes with impressive super-slim sightlines, thus maximising light and views all year round!
We hope this step-by-step guide will help you understand how to toe and heel your new bifold, French or single door in the easiest and most efficient way possible. You can also find other handy information on our help and guides page.
To order your own set of UK-made aluminium bifold doors get in touch with our team today, or receive a quick quote via our online door designer. And, if you have any questions, we will be happy to assist you on 01924 929 600 or via email on sales@ukdoorsonline.co.uk.
If you’ve been researching aluminium windows and doors, you’ve probably come across the term thermal break. It’s a feature...
Large windows have become one of the most desirable features in modern homes, offering uninterrupted views, an abundance of...